
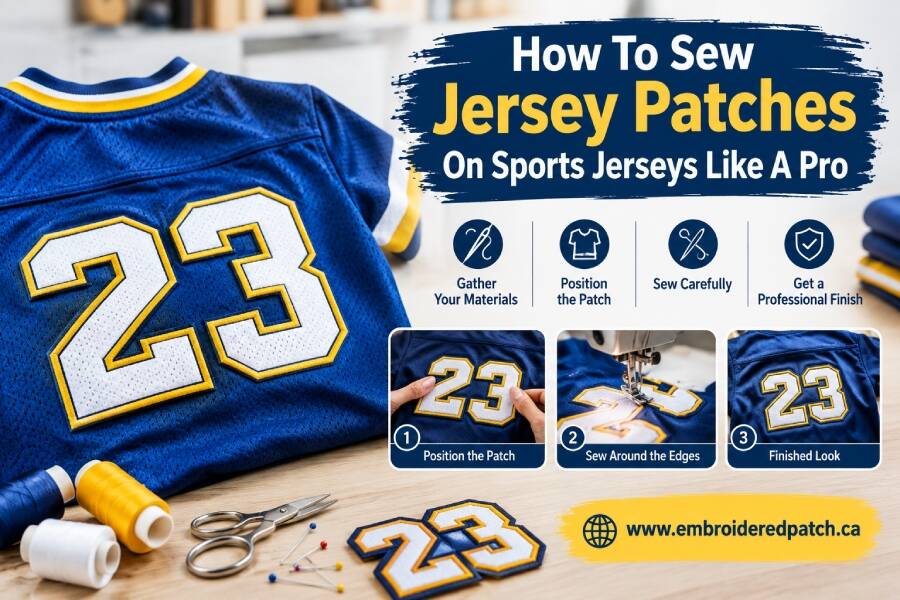
How To Sew Jersey Patches On Sports Jerseys Like A Pro
Looking for a professionally made jersey patch? Learn about easy sewing tips for jersey patches that will aid in ensuring proper placement of the patch, making even stitches, and fastening the patch on the jersey.
Secure Every Stitch For Lasting Results
A sports jersey is not only used for displaying a team’s name and numbers. One could use a patch to display their identity, honor a player, show affiliation to a particular club, or highlight some achievement. However, even the best patch may look messy if it is applied to the wrong place or in a sloppy way.
You don’t need any special sewing skills to achieve a professional-looking result. With the correct patch, proper thread, right placement, and steady sewing, you will succeed in creating a perfect-looking jersey.
Everything from preparing the jersey up to the very last sewing stroke contributes to keeping the patch on without destroying the jersey’s original appearance.
Choose A Patch That Matches The Jersey
The patch should fit the jersey before any stitches are made to it. The size, shape, colors, and material used in making the patch could influence its fit to the whole jersey.
A patch that is too big might end up covering some parts of the jersey, and one that is too small will fail to make enough impact. The design should also go well with the colors of the jersey.
For team uniforms, using custom patches in Canada could offer a solution for creating designs matching team colors, team names, team logos, or any other brand-related specifics.
Selecting the correct patch beforehand makes the whole sewing process easier, and it allows for a purposeful outcome rather than one that is simply an afterthought.
Prepare The Jersey For Smoother Sewing
A clean and flat jersey makes sewing easier. The jersey needs to be spread out on a flat surface before attaching the patch to check whether there are any folds, creases, or loose threads.
It is important that the area where the patch will go is clean and dry. This will make the process more comfortable, and the results will look much better.
Must check the fabric used for the jersey since sports jerseys are usually made of lightweight or stretchable fabric. Pulling the fabric hard while sewing may lead to uneven results.
Mark The Placement Before Stitching
Right positioning makes all the difference in the outcome. Before taking up the needle, ensure that the patch is properly placed.
A quick way of ensuring this is by using a cloth marker or some pins to keep the patch in place. This positioning needs to be checked from various directions to ensure that it is straight.
For jerseys that have numbers, logos, names, or even sponsors’ designs, sufficient space must be provided between the existing items and the new one.
Select Thread That Supports The Design
It is important to use a thread that can hold the patch but, at the same time, is compatible with the jersey material. Polyester threads are usually the best option because they are quite sturdy and also come in a wide variety of colors.
Matching the thread with the edge of the name patches can help reduce the visibility of the stitches. You can also use a contrast color thread to enhance its overall appearance.
The needle must match the material of the jersey. The proper needle will help in making neat holes without causing any damage.
Use Even Stitches For A Professional Finish
After placing the patch, the next step involves stitching along the patch’s perimeter. Short and even stitches tend to give a better look and aid in the distribution of pressure evenly.
The stitches should remain tight near the edge of the patch without sewing onto the patch. The tension on the stitches should remain high without gathering and stretching the jersey fabric.
Sewing consistently is another easy way to ensure that the patched item looks great. There is no need to hurry, especially when dealing with an expensive sports jersey.
Stitch Around Curves With Extra Care
However, not all patches have straight edges. Round, oval, curved, and irregular patches need special care during sewing.
The jersey fabric does not have to be forced around the needle; it can be easily shifted as each stitch is sewn. In this way, it will help avoid puckering and keep the patch’s edge smooth.
Another useful method is using smaller stitches to make curves easier to handle. Thread must stay even without stretching the fabric.
Keep Customized Details Clear And Secure
Some of the jerseys have players’ names, numbers, or club logos or designs on them. The patch has to enhance these elements instead of overshadowing them.
Customized jersey patches could be created depending on the current design of the jersey for that particular sport. This will make the creation of a patch much easier since everything will fit together nicely.
The patch needs to be examined against other elements before sewing. The patch’s placement and shape should enable the viewer to identify the major features of the jersey easily.
Secure The Final Stitch Without Bulk
Once the whole patch has been sewn, there is a need to fasten the final thread. A small knot made at the inner part of the jersey will help secure the sewing and ensure that it does not come off.
The loose end of the thread should then be snipped off neatly. The thread should not be cut too near to the knot since that will affect the finish.
The other side of the jersey should also be inspected to see whether there are any loose threads or loops. An even finish on the inside would improve the comfort of the jersey when worn.
Final stitches must keep the patch in place without adding a bulky or uncomfortable layer on the inside.
What To Know Before Sewing Jersey Patches
Is it possible to stitch patches to stretchy jerseys?
Yes, it is possible to stitch patches to stretchy jerseys as long as the jersey is not stretched when you are sewing it. This is because stretching it will result in puckering. Use an appropriate needle, thread, and small, even stitches.
Which type of thread is good for sewing jersey patches?
Use polyester thread for sewing jersey patches since it is flexible and strong enough. If you require a discreet look, consider using a thread that matches the edge of your patch.
Should the patch be pinned before you sew it?
Yes, pins will assist you in ensuring that the patch is correctly positioned before sewing. They should be put on the outside of the patch away from the stitch line. This will avoid any mistakes in positioning and the need for unstitching.
Can a jersey patch be unstitched in the future?
Yes, it can be unstitched with the help of a small seam ripper or scissors. This should be done gradually so that the jersey is not affected while unstitching it. There may be a few holes left on the jersey from unstitching.
How can you fix loose patch edges?
The loose edges of the patch can be stitched a little bit more. It needs to be done in such a way that the new stitches are in accordance with the existing ones and very close to the patch edge.
Conclusion
It becomes much simpler to sew a patch on a sports jersey when the whole process is done in a systematic manner. Picking an appropriate patch, preparing the fabric, checking the placement, picking the right thread, and making even stitches all lead to good results.
Careful stitch work along the curves and proper finishing will help avoid loose edges. The most important thing about sewing is not to hurry but to keep everything flat and stitched evenly.
Proper treatment of the patch afterwards will ensure that the patch stays in place while bringing an additional individual or team-oriented element to the jersey.

I am a creative blog writer at EmbroideredPatch.ca, where I share the blogs about expert insights, design tips, and the latest trends in custom patches and promotional branding. Our goal is to help businesses, clubs, and individuals turn their ideas into high-quality embroidered creations. Our content is written to uncover behind-the-scenes production knowledge, highlight expert design techniques, and share practical tips that help you create patches with confidence and creativity.